Introduction
Thanks for using our iot device. This is an instruction manual on how to use the SWEVEN IoT Box you have received.
Instructions
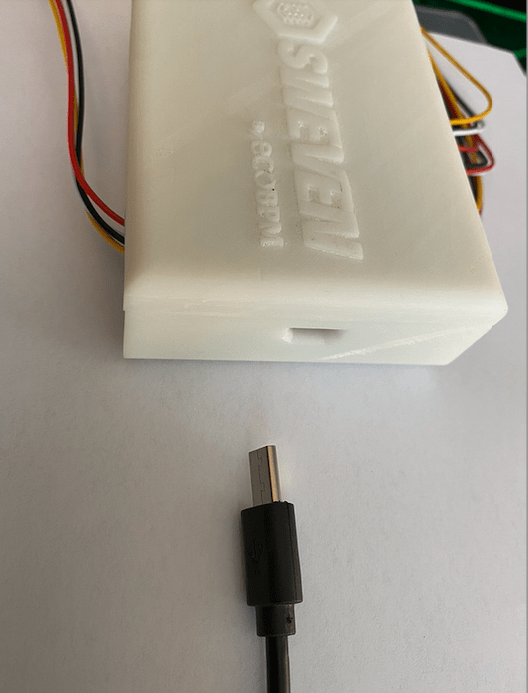
1 Connect the box to the power supply, as can be seen in the figure 1.
Case 1
If it is the first time you connect the board to the WiFi, follow the following steps:
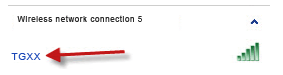
2 Look for the name of the board in your WiFi network search, the device has a typical name: TGXX, as can be seen in the figure 2.
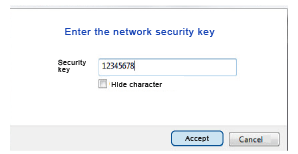
3 Select this network and connect with the following password: “12345678” as can be seen in the figure 3, then click accept.
4 A browser automatically opens a tab with the following information as can be seen in the figure 4:
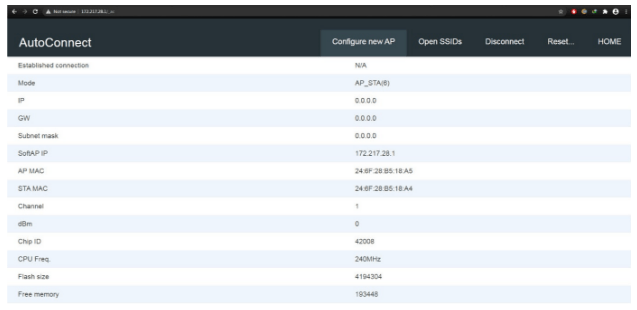
In the event that no tab or web page is opened, access through the following url: 172.217.28.1, the welcome screen should look like:

5 Now, we are going to enter the tab above called “Configure a new AP” in order to indicate which is the Wi-Fi network and the password to which we are going to connect to inter and give the board access to the platform as can be seen in the figure 6:
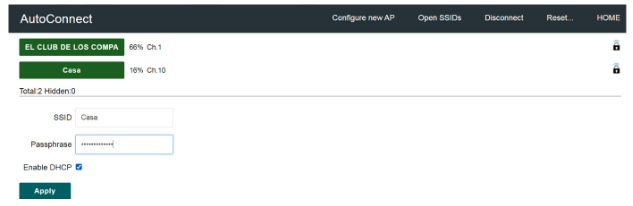
6 Add your router SSID and Password. For consistency, keep the Enable DHCP option as shown and press Apply.
7 If SSID and Password were set correctly, you should see the next screen (Figure 7).

8 Disconnect from TGXX and unplug and plug back the board. If the wifi credentials were set correctly and there is an internet connection on the router, TGXX should be displayed on Sweven platform, IoT module delivering data in real time.
CASE 2: now, if we have previously connected the board to WiFi, it will not appear in the name of the board in the network browser.
CASE 3: In case the board is connected to a router and this in turn does not have internet access, please disconnect the router so that the board can appear again in the Wifi browser and assign it a new network that does have internet access,
NOTE: After setting correctly the wifi Credentials, the hotspot is disabled. It will not be shown on your wifi networks as long as the board is connected to the configured router in the previous section.
If by any chance the router changes the SSID or Password, the board will activate the hotspot again waiting for those or any new values.
WHAT DO YOU SEE IN OUR WEB PAGE?
Through the following link: https://iot.swevenbpm.com/ you can see all the information received through the sensors.
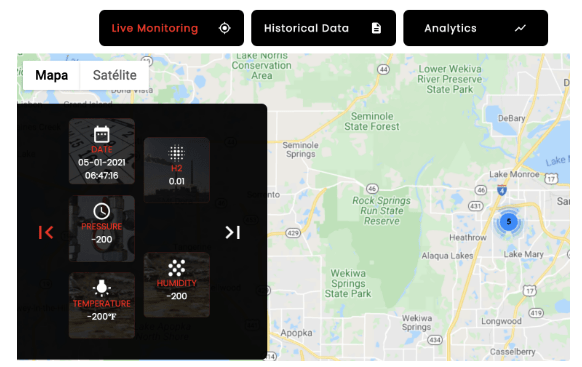
We can see 3 tabs at the bottom: Live Monitoring, Historical Data and Analytics, as can be seen in figure 8.

Live Monitoring: In this tab we have in a graphical way the data of each sensor, in addition to having a map where each acquired “Sweven” board can be located, as shown in the figure 9
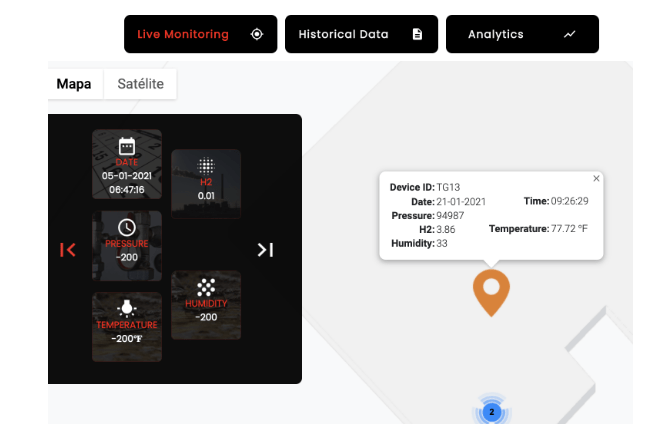
if we access the exact point where the map marks, we can also observe the data of each sensor that the plate contains, as shown in the figure 10.
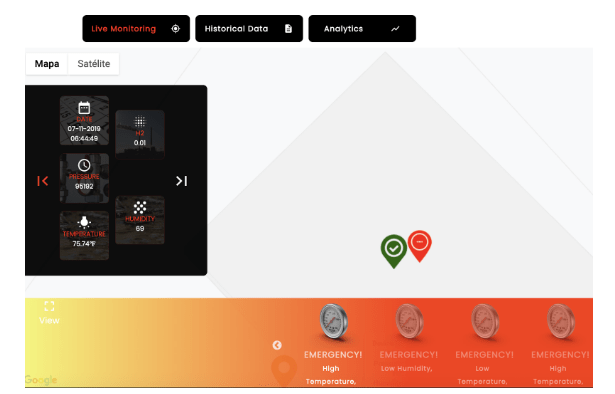
In the event that any sensor exceeds a set threshold, the system will display an alarm to alert of the possible anomaly, as can be seen in the figure 11.
Historical Data: In this tab you can see the history of each board with its respective sensors over time, it can be filtered by board, location or date, as shown in the figure 12.

- Date: show the exact date and time the data was collected.
- Site ID: identification number that the board has on the map.
- Sensor ID: identification number that the board has.
- Location: exact address of where the board is located.
- Temperature: data returned by the temperature sensor in degrees Fahrenheit
- Humidity: the humidity sensor outputs the relative humidity through a percentage (0-100%).
- H2: verifies air quality in units ppm (particles per million).
- Pressure: measures atmospheric pressure in units of pascals (Pa).